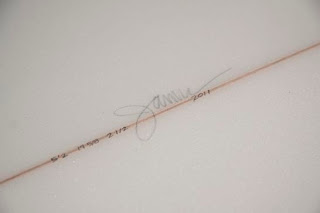
After having glassed the bottom of the board, I had heaps more conviction to glass the deck. I was going to go crazy with a board design, but figured I'd put my energy into glassing properly, so I screen printed a little J logo (Jason or Jasper) onto some tissue paper I bought from an art supplier for 20c.
Next I cut the glass in two sheets:
1 was cut to exactly the middle of the rail all around the board. This was kind of a neat fit. The next sheet of glass was cut with a 2inch lap. I also cut some extra pieces for the tail to help strengthen it.
I took my whole rig outside again and glassed it.
Using the mix I did for the bottom, I laid down a little resin on the foam and stuck down the decals I made. Then I rolled out the mid-rail section of glass, followed by the lapping section. I poured the resin on top (along the stringer) and glassed both sheets at the same time.
It seemed to go pretty well, with a slight difficulty at the swallow tail end. Although I cut V's into the glass sheet, it stretched a little with the resin, and the V's weren't lined up when I had a handful of hot resin. So I kind of lapped them and I'll need to go crazy with the sander to fix them up.
All up, I'm stoked with the final result.
I'll post a video when You Tube lets me upload one.
Thursday, March 10, 2011
Wednesday, March 9, 2011
Glass Bottom Boat
So I got the courage up to mix some resin again. This time I carefully worked out the mix ratio based on suggestions on the side of the Laminating Resin Tin, Surfer Steve's website and various forums on the net.
Here was my final mix:
900ml Laminating Resin
9ml Catalyst
I also worked out that 1 ml = 15 drops and also = 1cc
With the new mix, I double checked everything - put my gloves on, put the old clothes on, set up the shaping bay in the drive way and went for it. I was heaps nervous, but managed to get it on and wrapped with heaps of time to spare.
]
Cutting the Glass
A few weeks later and I got around to cutting the glass. I followed instructions on surfer steve's site here: http://www.surfersteve.com/glassing.htm which has proved to be invaluable. I cut the 6 oz glass with a 2inch overhang on all rails (which forms the lap to the deck side of the board). In the V shapes (swallow tail and nose) I cut small V shapes to allow the glass to wrap without buckling.


Resurrecting the board
So a year later I decided to have another go at the board.
Its been staring me in the face for 12 months nudging me to fix it up, so I caved in and went for it. Sanding was going to take way to long, so I decided to pull out the trusty planer. I set the planer to a really low trim and started planing the board (including the rails). After a few strokes, the old glass and resin came off. The rails were ruined, so I rough shaped them again with the planer, then re-shaped the board again. It proved to be a real pain to remove the glass from the deck where the rocker curved at the nose - because the planer was so low. If I carved in at it I risked planing half the nose off, and I figured hey the deck won;t really affect performance too much.
This made the board a fair bit smaller - which means I may not be able to surf it. The board is now 5'2, 19 5/8, 2 1/2.
But I am happy to have a blank blank again.

Subscribe to:
Posts (Atom)